Configuring tasks#
Every Hub is organized around “modeling tasks” that are defined to meet the needs of a project. Modeling tasks are defined for a hub in the tasks.json file, which specifies the model tasks (task ids and targets) as well as model output types. Here is a detailed definition of modeling tasks.
Step 1: Open tasks.json#
Check to be sure you are in the hub-config folder. Click on tasks.json to open the file.
Step 2: Examine the tasks.json file#
In your source panel (upper left hand panel), you should see the code below. Here is a description of each line of code in tasks.json.
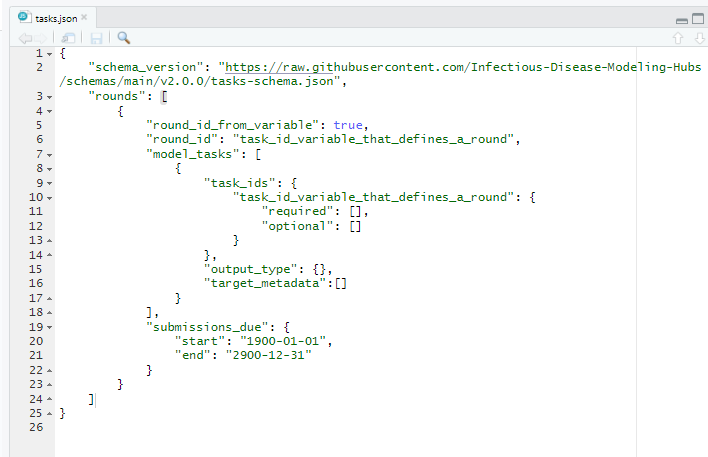
This tasks.json file serves as a template, and has very few values filled out, which gives the user flexibility to adapt the Hub to their own needs. Nevertheless, in order to learn how to properly use this schema, we will use a “premade” tasks.json file from the Simple Forecast Hub Example that already has values filled in, which will better illustrate what should go in each section.
Step 3: Close the tasks.json file in RStudio#
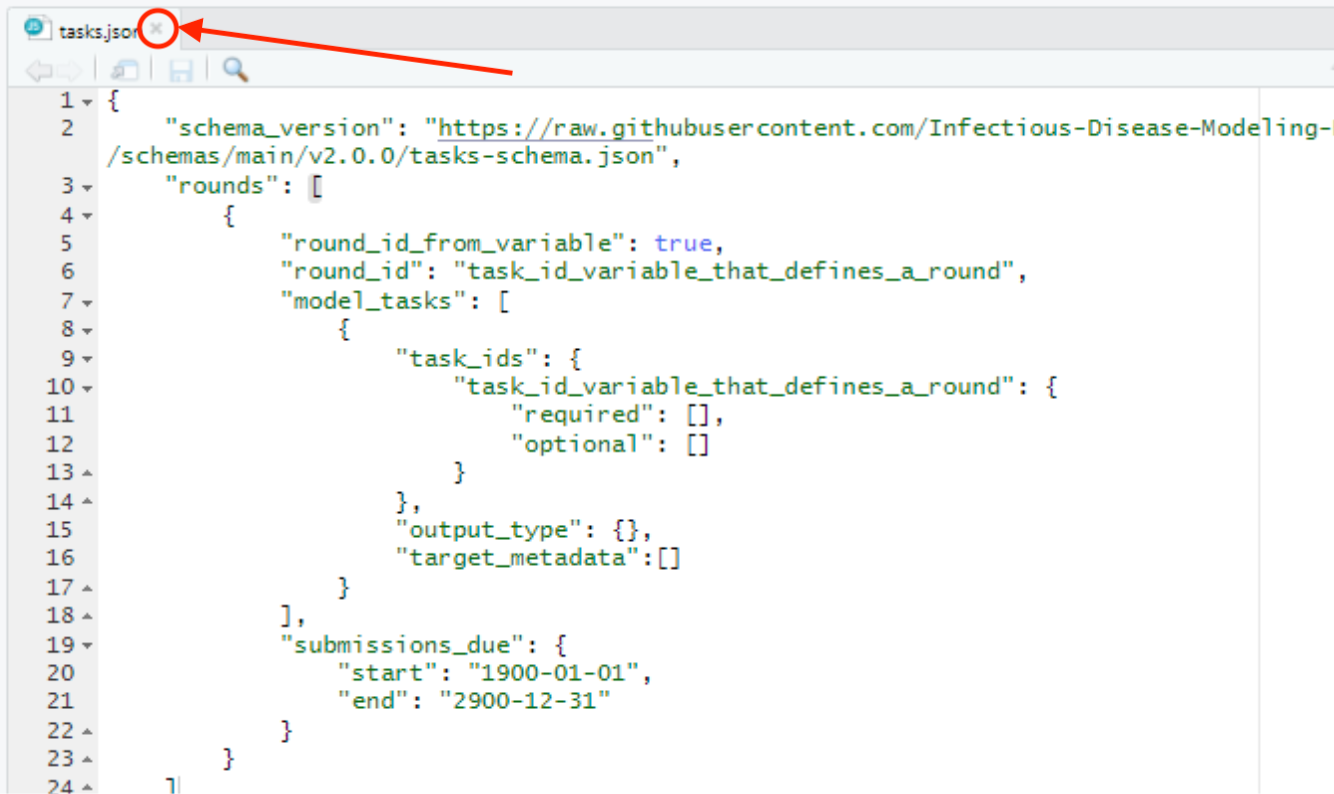
Make sure the tasks.json file in RStudio is closed, by clicking on the ‘x’ icon, as indicated below.
Step 4: Download a premade tasks.json file#
You can use this link to download the tasks.json file from the Example Forecast Hub by clicking on the Download Raw File icon as indicated below.

Save the file in the hub-config folder (which is in your repository on your local computer). This new file should replace the existing tasks.json file that was in this folder.
4.1: Examine the new tasks.json file#
Open tasks.json and explore the content and structure. Some key concepts are defined here, and a full explanation of all the supported elements in a tasks.json file can be found here. Simple explanations for elements in the Example Forecast Hub file are offered below:
schema_version: Modeling Hub Schema versions are all housed in this repository.round_id: The round identifier establishes which date from a forecast submission is used to identify the submission round it corresponds to (e.g., the origin date).model_tasks: Model tasks include all the goals of the modeling effort, including thetask_ids,output_type, andtarget_metadata.task_ids: The task identifiers set the optional and required elements that go into a forecast submission, such as thetarget,horizon,location, andorigin date.origin_date: The date when a forecast was generated. More information on this and other dates, including how to use theorigin_dateto calculate thetarget_datecan be found in the section on the usage of task ID variables.horizon: Sets the time range for which forecast predictions are to be made. For instance, these can be days into the future, or even days into the past, as in nowcasts.location: The geographic identifier, such as country codes or FIPS state/county level codes.output_type: A Model output type establishes the valid model output types such as the mean, or specific quantiles. A more detailed explanation of model outputs can be found in the section on model output formats.
Now, read below for details on some of the lines of code in this file:
Step 5: Define "task_ids"#
5.1. Establishing the "round_id" and "origin_date" (starting point):#
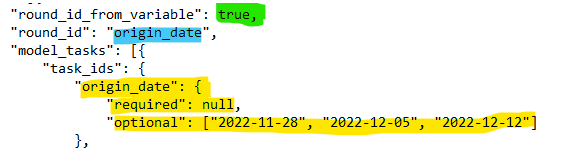
The code highlighted in green establishes that the round identifier is encoded by a task id variable in the data.
The code highlighted in light blue sets the round identifier as
"origin_date".task_idsincludes the variablesorigin_date,target,horizon, andlocation.The first variable,
origin_dateis highlighted in yellow and states that no origin dates are required, and that there are three valid, possible dates ("2022-11-28", "2022-12-05", "2022-12-12"). To be clear, no specificorigin_dateis required because every submission will have a differentorigin_dateas each submission corresponds to a different forecasting time period (compare this withlocation, where some specific locations may be required for every submission.
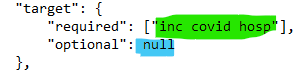
5.2. Setting the "target":#
The second line states that
"inc covid hosp"for example is the required target. Additional required targets could be added here.The third line states that there are no other optional targets that are valid. You could add
["cum covid hosp"]for example if you wanted to allow that target, but not require it.
5.3. Setting up the "horizon":#
The
horizonrefers to the difference between thetarget_dateand theorigin_datein time units specified by the hub (these could be days, weeks, or months).The second line indicates that no horizons are required.
The third line states that the forecast can be for up to 6 days before the
origin_date, and up to 14 days after theorigin_date.

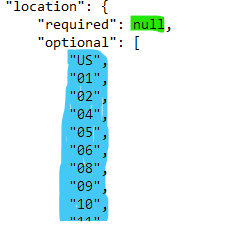
5.4. Setting up "location":#
The
locationrefers to the geographic identifier, such as country codes or FIPS state/county level codes.The second line states that no particular location is required, although in some instances, certain locations might be required for all submissions.
The third line indicates the locations that may be submitted. In this example, they are FIPS codes for US states and territories.
5.5. required and optional elements:#
As seen previously, each task_ids has a required and an optional property, to indicate expected information and possible additional information, respectively.
To indicate no possible additional information,
optionalcan be set tonull.If
requiredis set tonullbutoptionalcontains values, (see for example"location"): no particular value is required but at least one of theoptionalvalues is expected.There may be cases where we have multiple
model_tasksand a given task id is relevant to one or more model tasks, but not to others. For example, in the code snippet below, thehorizontask id is relevant to the first model task, whosetargetisinc covid hosp, and any one of the optional values specified are expected in thehorizoncolumn in a model output file. However,horizonis not relevant to the second model task, whosetargetispeak size. For this model task, bothrequiredandoptionalare set tonullin thehorizontask ID configuration andNAis expected in thehorizoncolumn in model output files.
"model_tasks": [{
                "task_ids": {
                    "origin_date": {
                        "required": null,
                        "optional": ["2022-11-28"]
                    },
                    "target": {
                        "required": ["inc covid hosp"],
                        "optional": null
                    },
                    "horizon": {
                        "required": null,
                        "optional": [0, 1, 2, 3, 4, 5, 6, 7, 8, 9, 10, 11, 12]
                    },
                    "location": {
                        "required": ["US"],
                        "optional": null
                    }
                },
                "output_type": {...},
                "target_metadata": [
                    {
                       "target_id": "inc covid hosp",
                       "target_name": "Daily incident COVID hospitalizations",
                       "target_units": "count",
                       "target_keys": {
                           "target": "inc covid hosp"
                       },
                       "description": "Daily newly reported hospitalizations where the patient has COVID, as reported by hospital facilities and aggregated in the HHS Protect data collection system.",
                       "target_type": "discrete",
                       "is_step_ahead": true,
                       "time_unit": "day"
                    }
                ],
            "task_ids": {
                    "origin_date": {
                        "required": null,
                        "optional": ["2022-11-28"]
                    },
                    "target": {
                        "required": ["peak size hosp"],
                        "optional": null
                    },
                    "horizon": {
                        "required": null,
                        "optional": null
                    },
                    "location": {
                        "required": ["US"],
                        "optional": null
                    }
                },
                "output_type": {...},
                "target_metadata": [
                    {
                       "target_id": "peak size hosp",
                       "target_name": "COVID-19 peak size hospitalizations",
                       "target_units": "count",
                       "target_keys": {
                           "target": "peak size hosp"
                       },
                       "description": "Magnitude of the peak of hospitalizations where the patient has COVID",
                       "target_type": "discrete",
                       "is_step_ahead": false
                    }
                ]
            }]
Step 6: Define "output_type":#
The
output_typeis used to establish the valid model output types for a given modeling task. In this example they includemeanandquantile, butmedian,cdf,pmf, andsampleare other supported output types. Output types have two additional properties, anoutput_type_idand avalueproperty, both of which establish the valid values that can be entered for this output type.
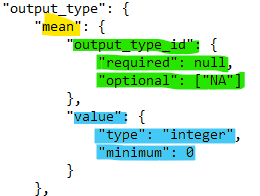
6.1. Setting the "mean":#
Here, the
"mean"of the predictive distribution is set as a valid value for a submission file."output_type_id"is used to determine whether themeanis a required or an optionaloutput_type. Both"required"and"optional"should be declared, and the option that is chosen (required or optional) should be set to["NA"], whereas the one that is not chosen, should be set tonull. In this example, the mean is optional, not required. If the mean is required,"required"should be set to["NA"], and"optional"should be set tonull."value"sets the characteristics of this validoutput_type(i.e., the mean). In this instance, the value must be anintegergreater than or equal to0.
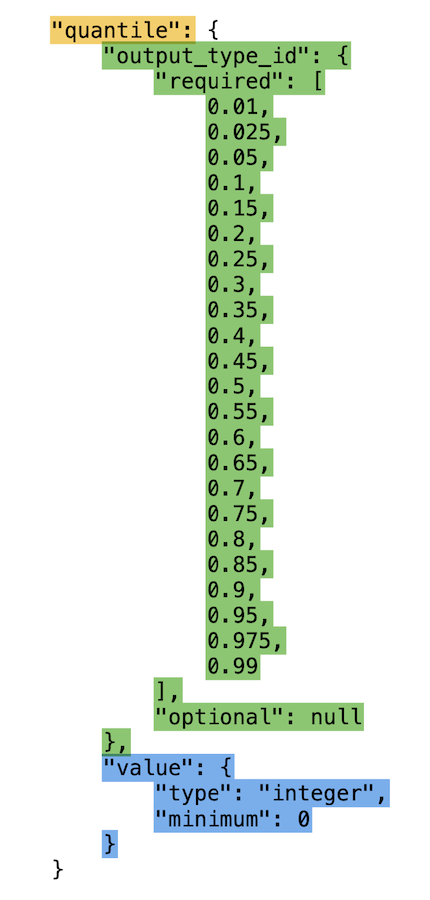
6.2. Setting up "quantile":#
Here,
quantilespecifies what quantiles of the predictive distribution are valid values for a submission file.In this case,
"output_type_id"establishes that this is a requiredoutput_type, and it sets the accepted probability levels at which quantiles of the predictive distribution will be recorded. In this case, quantiles are required at discrete levels that range from0.01to0.99. Quantileoutput_type_idvalues must NOT contain trailing zeros as this will cause submission validation checks to fail.As before,
"value"sets the characteristics of validquantilevalues. In this instance, the values must be integers greater than or equal to0.
Step 7: Defining "target_metadata":#
"target_metadata"defines the characteristics of each uniquetarget.To begin with,
"target_id"is a short description that uniquely identifies the target.Similarly,
"target_name"provides a longer, human readable description of the target."target_units"indicates the unit of observation used for this target. In this instance, the unit is count."target_keys"must match a target set intask_ids, to appropriately identify it. In this instance, the target is"inc covid hosp".The
"description"is a verbose explanation of the target, which might include details on the measure used for the target, as shown in the example below.The
"target_type"defines the target’s statistical data type. In this instance, the target uses discrete data."is_step_ahead"indicates whether the target is part of a sequence of values. In this instance, it is."time_unit"defines the units of the time steps. In this case, it is days.

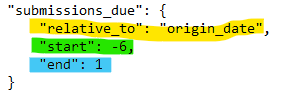
Step 8: Set up "submissions_due":#
"submissions_due"establishes the dates by which model forecasts must be submitted to the hub. It is used byhubValidationswhen validating submission files.
There are two ways in which one can set the dates during which model forecasts can be submitted:
By setting a
"relative_to"date, as well as"start"and"end"integers which set the range of dates in which submissions are accepted, as explained in the example below.
"relative_to"specifies the task id variable in relation to which submission start and end dates are calculated. In this instance it is"origin_date"."start"is a number used to calculate the beginning of the submission period, based on theorigin_date. In this example, the start date is six days prior toorigin_date.On the other hand,
"end"is a number used to calculate when the submission period is finished, based on theorigin_date. In this example, the end date is one day afterorigin_date.For instance, as was mentioned before, in this file,
2022-11-28is allowed as anorigin_date. In this case, submissions are due between “2022-11-22” (six days prior) and “2022-11-29” (one day after).
By setting explicit
"start"and"end"dates (rather than integers as in the previous case), during which forecast submissions are accepted. In this case, the"relative_to"line should be omitted altogether, as in the example below:
"submissions_due": {
    "start": "2022-06-07",
    "end": "2022-07-20"
}